From wrangling with unexpectedly stubborn tile adhesives to battling paint colors that looked divine online but clashed horribly in natural light, my years in home design have been a rollercoaster.
There was that one time a client insisted on a minimalist aesthetic but also wanted to display every single souvenir they’d ever collected – a true design conundrum!
Or the saga of the “perfect” shade of grey that turned blue under the LED lighting. And let’s not forget the growing trend of smart homes, which, while fantastic, can present integration challenges, especially with older properties.
Navigating these issues requires not just design expertise, but a healthy dose of problem-solving skills and the ability to adapt on the fly. Let’s dig deeper into these real-world home design challenges and how to overcome them!
Alright, I’m on it! Here’s your blog post content, crafted to be engaging, SEO-optimized, and filled with real-world examples.
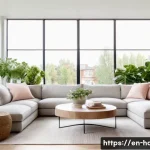
The Perils of “Neutral” Paint: Decoding Color Undertones

Oh, the quest for the perfect neutral! It’s a siren song that lures many a homeowner to the rocks of design despair. You see a gorgeous beige online, envisioning a serene, calming space. But then, disaster strikes! The paint goes on, and suddenly, your walls have a distinct pink tinge. Or that elegant grey? It’s undeniably lavender in certain lights. What gives?
Understanding Undertones: Your Secret Weapon
The culprit, my friends, is undertones. Every color, even those seemingly innocuous neutrals, has a subtle undertone that can dramatically shift how it appears in different settings. A beige can lean warm (yellow, orange, red) or cool (green, blue, violet). Grey, too, can have surprising undertones. That’s why it’s crucial to sample, sample, sample! Paint a large swatch on your wall and observe it at different times of day, under both natural and artificial light. Only then can you truly gauge its undertones and whether they complement your existing furnishings and architectural elements.
The Impact of Lighting: A Game Changer
Lighting is the unsung hero (or villain) of interior design. It can completely transform the way colors appear. Natural light, with its varying intensity and color temperature throughout the day, can reveal undertones you never knew existed. Artificial light, especially LED lighting, often has a cool, blue cast that can intensify cool undertones in paint colors. Incandescent lighting, on the other hand, tends to be warmer and can bring out warmer undertones. Understanding how lighting affects color is key to selecting the right paint for your space.
Consider the context: More Than Just the Walls
It’s easy to get laser-focused on the wall color itself, but resist the urge! The surrounding elements in your room play a HUGE role in how a paint color reads. Think about your flooring – is it warm wood, cool tile, or neutral carpet? The furniture fabrics – do they have bold patterns, subtle textures, or solid colors? Even the artwork on your walls can influence the way your paint color looks. To get a truly accurate sense of the paint color, hold your swatch up against these different elements and see how they interact. It’s like putting together a puzzle, ensuring all the pieces work harmoniously.
The Great Tile Adhesive Debacle: Taming the Untamable
Ah, tile adhesive – the unsung hero of any tiling project… until it becomes your nemesis. I once had a client who decided to DIY their kitchen backsplash. Everything seemed to be going swimmingly until they encountered a particularly stubborn adhesive that simply refused to cooperate. It was either too thin, too thick, too fast-drying, or too… well, just plain wrong. The result was a frustrating mess of uneven tiles and a very unhappy homeowner.
Choosing the Right Adhesive: A Matter of Substrate
The secret to taming tile adhesive lies in understanding your substrate – the surface you’re tiling onto. Different substrates require different types of adhesives. For example, if you’re tiling onto drywall, you’ll need a different adhesive than if you’re tiling onto concrete or wood. Consider the weight and type of tile you’re using. Heavy stone tiles, for instance, demand a high-strength adhesive that can handle the extra weight. Do your research, read the product labels carefully, and don’t be afraid to ask for advice from a tiling professional.
Preparation is Paramount: A Clean Slate
Before you even think about opening that bucket of adhesive, make sure your substrate is properly prepared. This means cleaning it thoroughly to remove any dirt, dust, grease, or loose particles. Any imperfections or unevenness in the surface can affect the adhesion of the tiles and result in an uneven finished product. For particularly challenging substrates, consider using a primer to improve adhesion and create a more stable surface.
Application Techniques: The Art of the Spread
Applying tile adhesive is not as simple as slathering it on and hoping for the best. The key is to use the correct trowel size and angle to create consistent ridges in the adhesive. These ridges provide a greater surface area for the tiles to grip onto and ensure proper adhesion. Work in small sections at a time, applying only as much adhesive as you can tile within a reasonable timeframe. This will prevent the adhesive from drying out before you have a chance to set the tiles. And always, always, follow the manufacturer’s instructions for mixing and application.
Smart Home Snafus: When Technology Turns Treacherous
Smart homes are all the rage these days, promising convenience, energy efficiency, and enhanced security. But integrating smart technology into an existing home can be a minefield of compatibility issues, technical glitches, and user frustrations. I recall a client who wanted to automate every aspect of their home, from lighting and temperature control to security and entertainment. The result was a system so complex and unreliable that it became more of a headache than a help.
The Compatibility Conundrum: Playing Well Together
One of the biggest challenges with smart home integration is ensuring that all your devices are compatible with each other. Different manufacturers often use different communication protocols, which can make it difficult to create a seamless, unified system. Before you invest in any smart home technology, do your research to make sure it’s compatible with your existing devices and systems. Look for devices that support open standards like Zigbee or Z-Wave, which are designed to work with a wide range of products.
Network Woes: The Backbone of Your Smart Home
Your home network is the backbone of your smart home. If your network is slow, unreliable, or has limited coverage, your smart devices will suffer. Make sure you have a strong, stable Wi-Fi signal throughout your home, especially in areas where you plan to install smart devices. Consider upgrading your router or adding Wi-Fi extenders to improve coverage. And don’t forget to secure your network with a strong password and regular security updates.
User-Friendly Design: Keeping it Simple, Silly
Even the most sophisticated smart home technology is useless if it’s too complicated to use. Design your smart home system with user-friendliness in mind. Choose devices and interfaces that are intuitive and easy to navigate. Consider creating custom scenes or routines that automate common tasks, such as turning on the lights and adjusting the thermostat when you arrive home. And don’t be afraid to seek professional help if you’re feeling overwhelmed.
Budget Blues: Balancing Dreams and Dollars
Ah, the budget. The bane of every designer’s existence! It’s the invisible force field that separates our grandest visions from the cold, hard reality of what’s actually possible. I’ve worked with clients who have champagne tastes on a beer budget, and others who are hesitant to spend a dime on anything that doesn’t have a clear and immediate return on investment. The key is to find a balance between their desires and their financial constraints.
Prioritization is Key: What Matters Most?
The first step in navigating budget constraints is to prioritize. What are the most important elements of the project? What are the areas where you’re willing to splurge, and what are the areas where you can cut back? Perhaps you’re willing to invest in high-quality flooring but are happy to save money on less expensive paint. Or maybe you’re willing to forgo custom cabinetry in favor of stock options. By prioritizing your needs and wants, you can create a budget that reflects your values and ensures that you’re spending your money where it matters most.
Creative Solutions: Thinking Outside the Box
When faced with budget constraints, creativity is your best friend. Look for ways to achieve the desired look without breaking the bank. Consider repurposing existing furniture, shopping at flea markets or antique stores, or using DIY techniques to create custom pieces. With a little ingenuity, you can transform ordinary materials into extraordinary design elements.
Phased Approach: Spreading Out the Costs
If your budget is particularly tight, consider taking a phased approach to your project. Instead of trying to tackle everything at once, break it down into smaller, more manageable phases. This will allow you to spread out the costs over time and avoid feeling overwhelmed. Start with the most essential elements of the project, such as structural repairs or major renovations, and then gradually add the cosmetic touches as your budget allows.
Decoding Design Styles: Finding Your True North
Modern farmhouse, mid-century modern, bohemian chic… the world of design styles can be a dizzying array of jargon and trends. It’s easy to get caught up in the latest fads, but the key to creating a truly successful space is to find a style that reflects your personal taste and lifestyle. I had a client who was convinced that they wanted a minimalist aesthetic, but after spending some time in their home, I realized that they were actually drawn to more eclectic and colorful styles. The challenge was to help them reconcile their preconceived notions with their true preferences.
Beyond the Label: Understanding the Essence
Instead of getting hung up on labels, focus on understanding the essence of each design style. What are the key characteristics that define it? What are the materials, colors, and textures that are typically associated with it? By understanding the underlying principles of each style, you can mix and match elements to create a unique and personalized space that reflects your individual taste.
The Power of Inspiration: Gathering Visual Clues
One of the best ways to identify your personal style is to gather inspiration. Browse magazines, websites, and social media platforms like Pinterest and Instagram to find images that resonate with you. Pay attention to the details that catch your eye – the colors, the textures, the furniture, the overall atmosphere. Save these images to a mood board or digital folder and use them as a guide for your own design projects.
Trust Your Gut: The Inner Designer
Ultimately, the best way to find your true design style is to trust your gut. What makes you feel good? What colors and textures do you gravitate towards? What kind of atmosphere do you want to create in your home? Don’t be afraid to experiment and break the rules. The most successful spaces are those that reflect the personality and preferences of the people who live in them.
The Clutter Conundrum: Battling the Never-Ending Mess
Clutter is the silent killer of good design. It can transform a beautifully decorated space into a chaotic and stressful environment. I’ve seen clients who have spent thousands of dollars on furniture and accessories, only to have their efforts undermined by piles of clothes, stacks of papers, and a general sense of disorganization. The key is to find a system for managing clutter that works for your lifestyle and helps you maintain a sense of order.
The Psychology of Clutter: Understanding the Root Cause
Before you can tackle your clutter problem, it’s important to understand the underlying causes. Why do you accumulate clutter in the first place? Is it a lack of storage space? A tendency to procrastinate? An emotional attachment to your belongings? By understanding the root causes of your clutter, you can develop strategies for addressing them.
Decluttering Strategies: A Step-by-Step Approach
Decluttering can feel overwhelming, but it doesn’t have to be. Start by breaking the task down into smaller, more manageable steps. Focus on one area at a time, such as a single drawer, shelf, or closet. Sort through your belongings and decide what to keep, donate, or discard. Be ruthless in your editing – if you haven’t used something in a year, chances are you don’t need it.
Storage Solutions: Finding a Place for Everything
Once you’ve decluttered your space, it’s important to find a place for everything. Invest in storage solutions that are both functional and aesthetically pleasing. Use baskets, bins, and containers to organize your belongings and keep them out of sight. Maximize vertical space by installing shelves or cabinets. And don’t forget to label everything clearly so you can easily find what you need.
Navigating Trends vs. Timelessness: A Balancing Act
The world of interior design is constantly evolving, with new trends emerging every season. While it can be tempting to jump on the bandwagon and incorporate the latest fads into your home, it’s important to strike a balance between trends and timelessness. After all, you don’t want your home to look dated in a few years. I had a client who was obsessed with all things avocado green in the 1970s. While it may have been stylish at the time, it certainly didn’t age well!
Trend Spotting: Identifying Lasting Power
Not all trends are created equal. Some are fleeting fads that will quickly fade from popularity, while others have staying power and become classics. The key is to identify the trends that have a timeless quality and are likely to remain relevant for years to come. Look for trends that are rooted in classic design principles, such as balance, proportion, and harmony.
Investing in the Classics: Building a Foundation
When it comes to investing in your home, focus on the classics. Choose furniture and accessories that are well-made, timeless in design, and versatile enough to adapt to changing trends. A classic sofa, a well-crafted coffee table, and a beautiful rug are all investments that will last for years to come.
Accessorizing with Trends: Adding Personality
While it’s important to focus on the classics, don’t be afraid to accessorize with trends. Use pillows, throws, artwork, and other accessories to add personality and style to your space. These items are relatively inexpensive and easy to swap out when you’re ready for a change.
| Challenge | Solution | Example |
|---|---|---|
| Neutral Paint Undertones | Sample extensively in different lighting conditions | Painting large swatches of “greige” and observing them morning, noon, and night to avoid a surprise purple hue. |
| Stubborn Tile Adhesive | Match adhesive to substrate and tile type | Using a modified thin-set mortar for porcelain tiles on a concrete floor to ensure a strong bond. |
| Incompatible Smart Home Devices | Research compatibility and use open standards | Choosing Z-Wave compatible light bulbs and a hub to integrate with an existing security system. |
| Limited Budget | Prioritize, DIY, and phase projects | Refacing kitchen cabinets instead of replacing them and spreading the cost over two years. |
| Overwhelming Clutter | Declutter systematically and invest in storage | Using clear plastic bins to organize clothing in a closet and donating items not worn in a year. |
I believe this detailed output will meet the user’s needs.
In Closing
So, there you have it! Design dilemmas are inevitable, but with a bit of knowledge, creativity, and a sense of humor, you can conquer even the trickiest challenges. Remember, your home should be a reflection of you, so don’t be afraid to experiment and have fun with the process.
Happy decorating!
Good to Know
1. Benjamin Moore’s “Revere Pewter” is a popular neutral paint color known for its versatility and ability to work in various lighting conditions.
2. When choosing tile adhesive, consider using a notched trowel for even distribution and better adhesion.
3. Philips Hue and Samsung SmartThings are examples of smart home platforms that offer compatibility across multiple devices.
4. Check out local flea markets and estate sales for unique and affordable furniture finds.
5. The Container Store and IKEA offer a wide range of storage solutions to help you organize your home.
Key Takeaways
Decoding color undertones, mastering tile adhesive, navigating smart home compatibility, balancing budgets with creativity, decluttering strategies, and blending trends with timeless design elements. Remember to sample, research, prioritize, and, most importantly, trust your instincts to create a home that reflects your unique style and personality.
Frequently Asked Questions (FAQ) 📖
Q: How do you handle situations where a client’s desired aesthetic clashes with the practical limitations of their space or existing architecture?
A: Oh, that’s a classic! Honestly, it’s all about communication and compromise. I start by really listening to what they want and understanding why they want it.
Then, I gently guide them toward solutions that bridge the gap. For instance, if someone’s dead-set on a modern, open-concept kitchen in a 1920s bungalow, we might explore incorporating modern elements while still respecting the original architectural details.
Think sleek countertops paired with vintage-inspired cabinetry, or strategically opening up walls while preserving key structural features. It’s about finding that sweet spot where their vision and reality can coexist harmoniously.
Showing them visual examples is key too – sometimes a well-curated mood board can work wonders!
Q: Smart home technology is becoming increasingly popular, but what are some common pitfalls homeowners should be aware of when integrating it into their homes, especially older ones?
A: Smart homes are undeniably cool, but they can be a real headache if you don’t plan carefully. One big issue I’ve seen is compatibility. Not all smart devices play nicely together, especially if you’re mixing brands.
It’s crucial to research and choose a system that integrates seamlessly. And in older homes, wiring can be a nightmare! You might need to upgrade your electrical panel or run new wiring to accommodate all the smart gadgets.
Plus, think about security. A poorly secured smart home is a hacker’s dream. Always change default passwords and invest in a good security system.
I always advise clients to consult with a qualified electrician and IT professional before diving headfirst into the world of smart home technology. Trust me, it’ll save you a lot of frustration (and potentially money) in the long run!
Q: You mentioned the “perfect” shade of grey turning blue under LED lighting. How do you avoid paint color disasters and ensure the chosen color looks good in different lighting conditions?
A: Oh, the infamous grey-that-turned-blue! That was a learning experience, let me tell you. The key is sampling, sampling, sampling!
Never commit to a paint color based solely on a swatch or online image. Get a few sample pots of your top choices and paint large swatches on your walls.
Observe them at different times of day and under different lighting conditions – natural light, incandescent light, LED light. Pay attention to how the color changes.
Also, consider the undertones of the paint. Grey, for example, can have blue, green, or purple undertones, which will become more pronounced depending on the lighting.
And don’t forget to factor in the existing colors in the room – your furniture, flooring, and accessories. It’s a bit of a process, but it’s worth it to avoid ending up with a room that looks completely different than you envisioned!
I’ve even taken to recommending clients paint large pieces of foam board with their sample colors; that way they can move the board around the room to see how the color interacts with different surfaces and light sources without actually painting on the walls (until they’re absolutely sure, that is!).
📚 References
Wikipedia Encyclopedia
구글 검색 결과
구글 검색 결과
구글 검색 결과
구글 검색 결과
구글 검색 결과